Looking for a way to use and set up keyboard shortcuts for Snipping Tool on Windows 10? This article will guide you through how to take screenshots quickly!
 |
| How to use the Snipping Tool shortcut to take screenshots on your computer |
Instructions on how to create a shortcut to quickly open Snipping Tool
Setting up keyboard shortcuts for the Snipping Tool saves you time and effort, especially when you frequently need to take screenshots. Windows 10 does not provide a built-in keyboard shortcut for the Snipping Tool, but you can easily create a custom keyboard shortcut. Here are simple ways for you to create a shortcut to quickly and conveniently open the Snipping Tool.
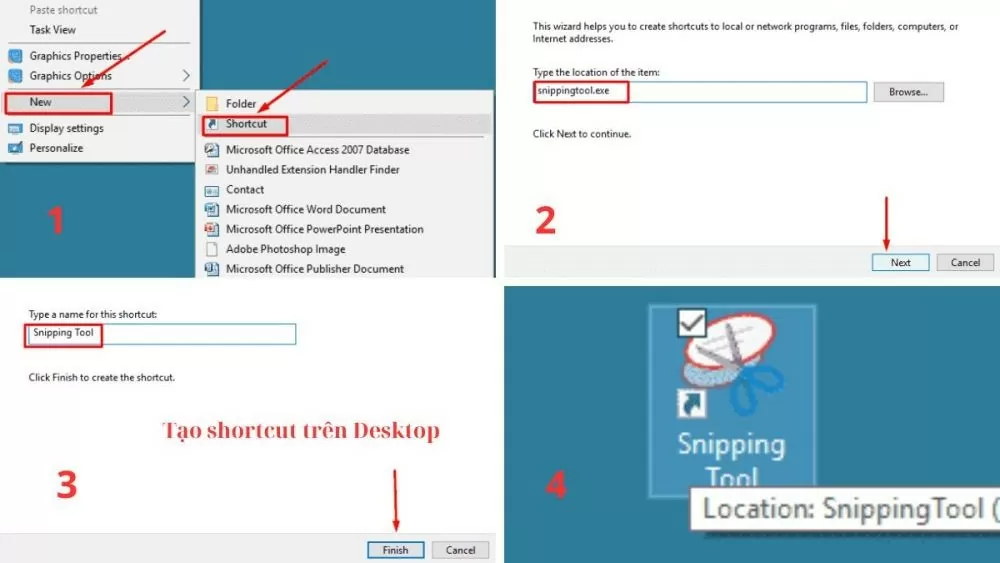
Method 1: Instructions for creating shortcuts on the Desktop
Step 1: On the Desktop, right-click, select "New", then select "Shortcut".
Step 2: Next, in the "Type the location of the item" field, enter "snippingtool.exe" and click "Next" to continue.
Step 3: Give this shortcut a name of your choice, then click "Finish" to complete the creation process.
Step 4: Now you have a shortcut of Snipping Tool on Desktop. Just double click this shortcut to open Snipping Tool quickly.
 |
| How to use the Snipping Tool shortcut to take screenshots on your computer |
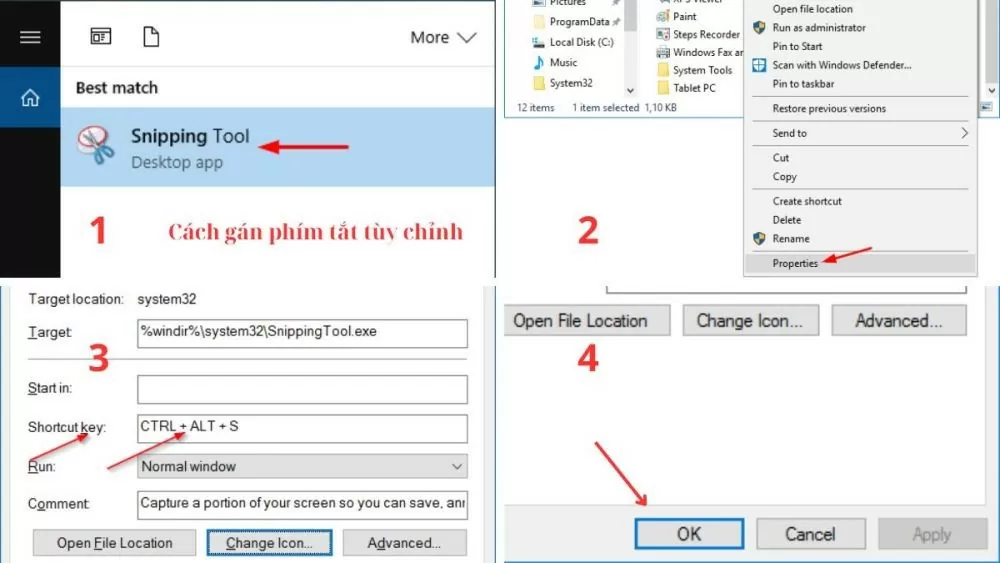
Method 2: Instructions for assigning custom shortcut keys
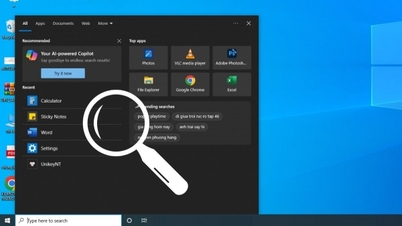
Step 1: Open Start Menu and search for "Snipping Tool", right-click on the Snipping Tool icon, then select "Properties" to access the shortcut settings.
Step 2: In the "Shortcut" tab, click the "Shortcut key" box and enter the shortcut key combination you want to use (e.g., Ctrl + Alt + S).
Step 3: Click "Apply" then "OK" to apply and save the changes.
Step 4: From now on, you just need to use the shortcut key combination you just set up to open Snipping Tool quickly and conveniently.
 |
| How to use the Snipping Tool shortcut to take screenshots on your computer |
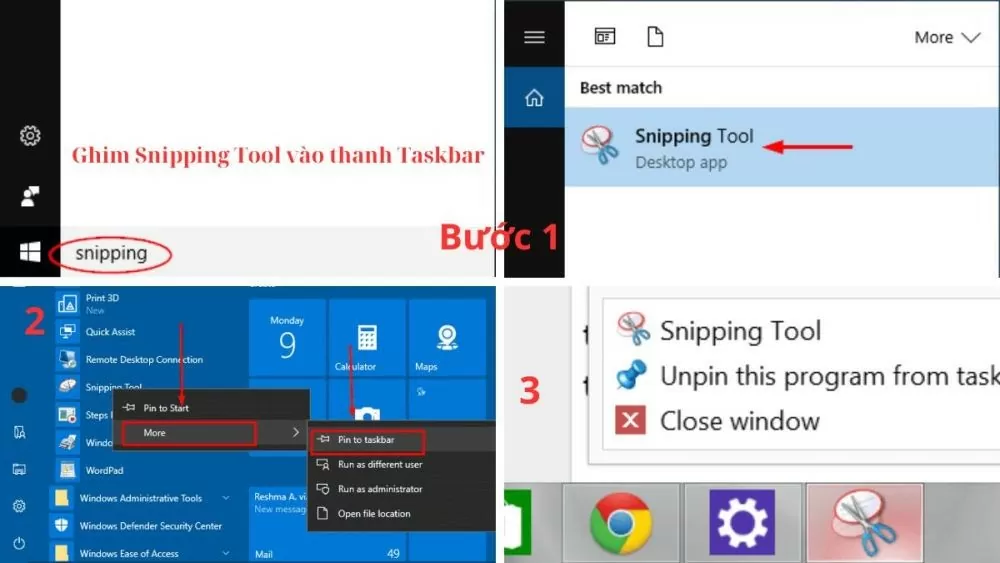
Method 3: Instructions on how to pin Snipping Tool to the Taskbar
This is the simplest way to quickly access Snipping Tool without searching or using other shortcuts.
Step 1: Open the Start Menu and type "Snipping Tool" in the search box.
Step 2: When the Snipping Tool app appears in the search results, right-click on its icon, select "More", then select "Pin to taskbar" for easy access and use later.
Step 3 : Now, the Snipping Tool icon has appeared on the Taskbar. Just click on this icon to quickly open Snipping Tool.
 |
| How to use the Snipping Tool shortcut to take screenshots on your computer |
Instructions on how to take screenshots on Windows computers using Snipping Tool
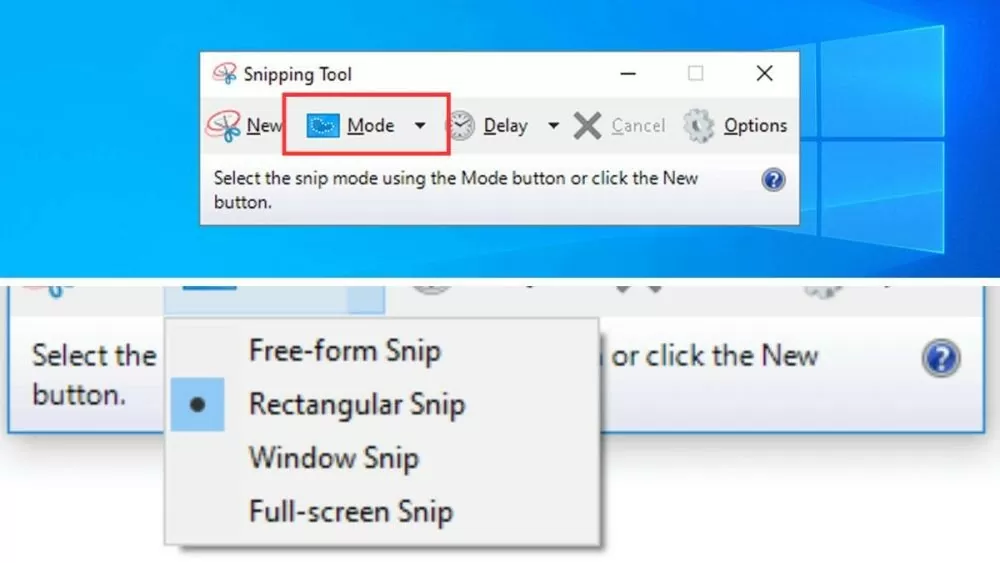
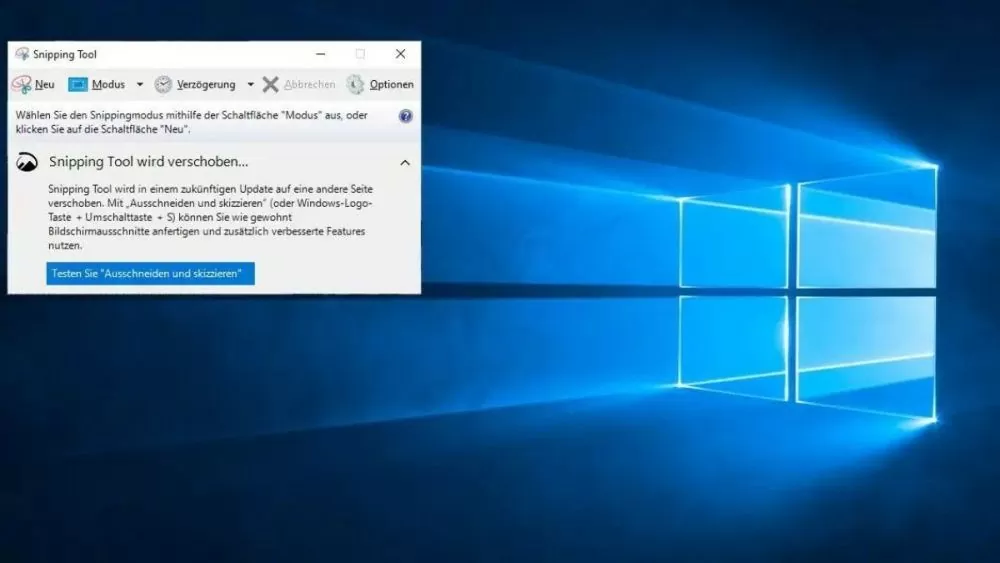
Once you know how to use the Snipping Tool shortcut or open it via the search bar, you will see the Snipping Tool interface with capture options. This shortcut offers a variety of modes, from full-screen capture to custom area capture, to meet all your capture needs.
Full-screen Snip mode on computer
This is the simplest and fastest way to capture the entire content displayed on your computer screen. To capture the entire screen, just press the "Prt Sc" key or open the Snipping Tool from the Taskbar and select the "Full-screen Snip" mode. Immediately, the entire screen will be captured, and you can easily edit or save the screenshot.
Window Snip mode on computer
This mode is useful when you only want to capture a specific active window. After pressing the Windows logo key + Shift + S shortcut key combination or clicking on the Snipping Tool icon on the Taskbar and selecting "Window Snip", move the mouse cursor to the window you want to capture and click to automatically record the entire contents of that window.
Rectangular Snip mode on computer
The "Rectangular Snip" mode allows you to freely select a rectangular area on the screen to capture. After installing the Snipping Tool shortcut, select "Rectangular Snip" and hold down the left mouse button, then drag to circle the content you want to capture. As soon as you release the mouse button, the Snipping Tool will automatically capture the area you selected.
 |
| How to use the Snipping Tool shortcut to take screenshots on your computer |
Free-form Snip mode on computer
The "Free-form Snip" mode offers maximum flexibility in selecting the capture area. You can draw any shape around the area you want to capture. First, open the Snipping Tool and select "Free-form Snip". Next, hold down the left mouse button and draw freely around the area you want to capture. When you release the mouse button, the Snipping Tool will capture the area you just drew.
 |
| How to use the Snipping Tool shortcut to take screenshots on your computer |
Instructions for taking screenshots using Snipping Tool
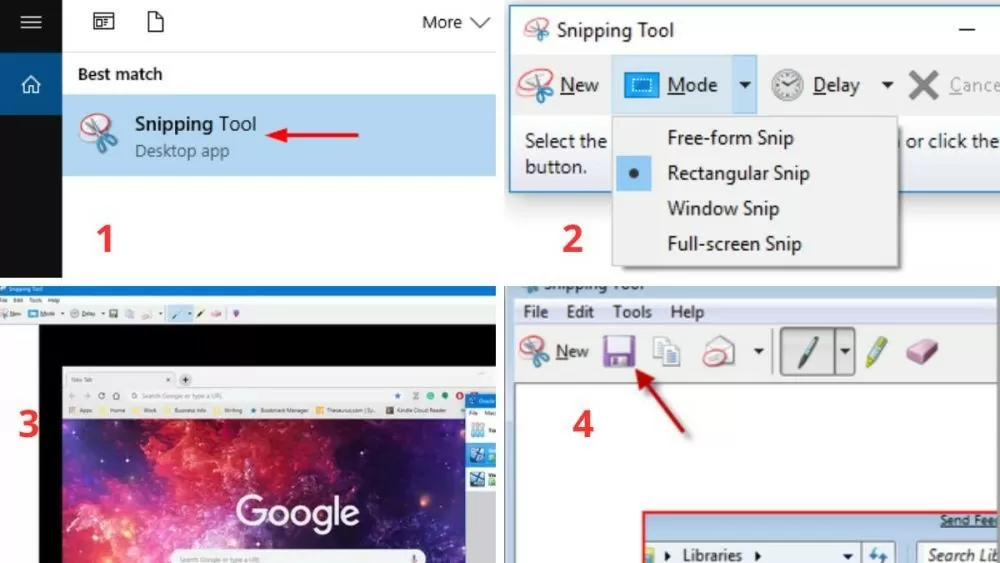
Step 1: Open Snipping Tool using the installed shortcut or search for "Snipping Tool" in the Start Menu.
Step 2: Choose the capture mode that suits your needs, like full screen, window, custom region, or freehand.
Step 3: Take a photo by performing the operations appropriate to the shooting mode you have selected.
Step 4: After taking a screenshot, you can edit the image using Snipping Tool's tools, then save or share the screenshot.
 |
| How to use the Snipping Tool shortcut to take screenshots on your computer |
By mastering the Snipping Tool shortcuts, you will optimize your workflow and save a lot of time. Hopefully, this article has helped you better understand how to use and set up shortcuts on Windows 10. Try it out and discover more useful features to improve your work and study efficiency.
Source: https://baoquocte.vn/cach-su-dung-phim-tat-snipping-tool-de-chup-man-hinh-tren-may-tinh-279591.html


![[Photo] General Secretary To Lam attends the ceremony to celebrate the 80th anniversary of the post and telecommunications sector and the 66th anniversary of the science and technology sector.](https://vphoto.vietnam.vn/thumb/1200x675/vietnam/resource/IMAGE/2025/9/29/8e86b39b8fe44121a2b14a031f4cef46)

![[Photo] General Secretary To Lam, Secretary of the Central Military Commission attends the 12th Party Congress of the Army](https://vphoto.vietnam.vn/thumb/1200x675/vietnam/resource/IMAGE/2025/9/30/9b63aaa37ddb472ead84e3870a8ae825)

![[Photo] Many streets in Hanoi were flooded due to the effects of storm Bualoi](https://vphoto.vietnam.vn/thumb/1200x675/vietnam/resource/IMAGE/2025/9/29/18b658aa0fa2495c927ade4bbe0096df)
![[Photo] General Secretary To Lam receives US Ambassador to Vietnam Marc Knapper](https://vphoto.vietnam.vn/thumb/1200x675/vietnam/resource/IMAGE/2025/9/29/c8fd0761aa184da7814aee57d87c49b3)




![[Photo] National Assembly Chairman Tran Thanh Man chairs the 8th Conference of full-time National Assembly deputies](https://vphoto.vietnam.vn/thumb/1200x675/vietnam/resource/IMAGE/2025/9/29/2c21459bc38d44ffaacd679ab9a0477c)




Comment (0)