Is your Samsung phone screen not displaying as expected? Discover how to adjust DPI on Android in 3 simple and extremely quick ways below!
 |
DPI, or "Dots per inch," is a measure of the resolution of a phone screen. It's an important term in technology because it affects the quality of images and text displayed. During the manufacturing process, device manufacturers like Samsung often set a default DPI for each product.
Adjusting DPI on Samsung devices helps optimize display quality, thereby improving user experience. When performing DPI adjustment on the latest Android version, icons, text and images will become sharper or larger, depending on your needs.
How to adjust Samsung DPI using Quick Screen Setup
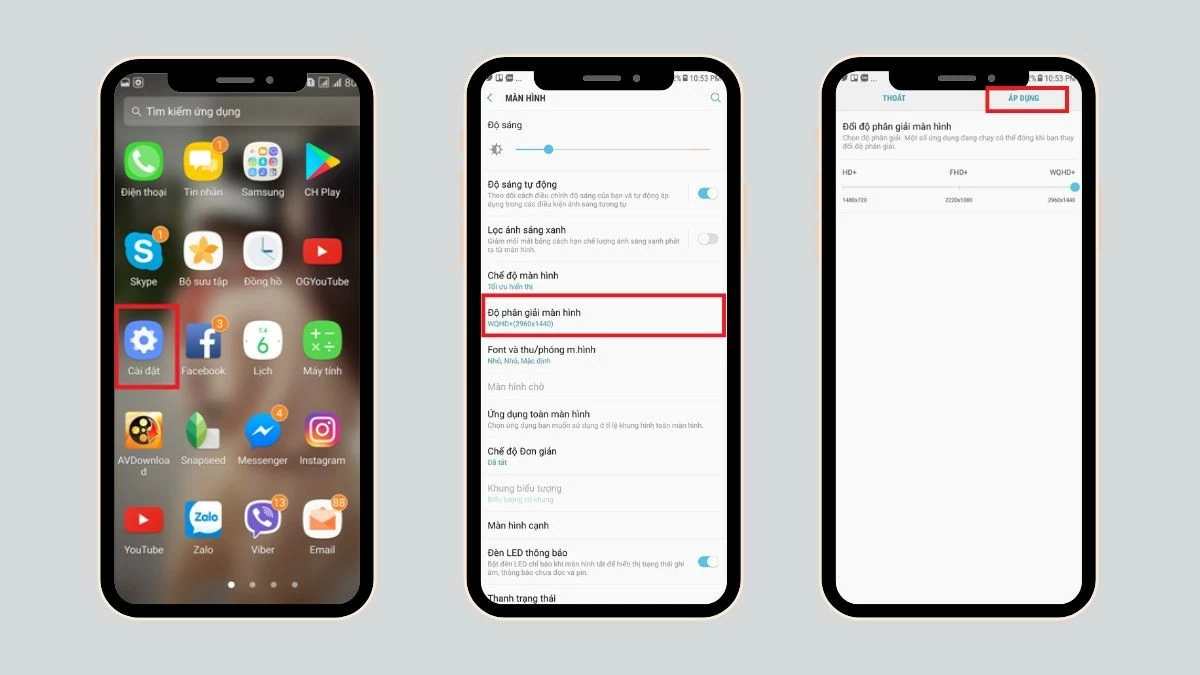
Adjusting DPI on Samsung devices is quick and easy. The process for adjusting DPI via display settings on Android devices from version 7.0 onwards is similar to this:
Step 1: First, open the Settings app and find the Display section.
Step 2: Drag the slider on the resolution bar to select the DPI level you want.
Step 3: Finally, click the Apply button to update the DPI settings.
 |
Instructions on how to adjust Samsung DPI in Developer Settings
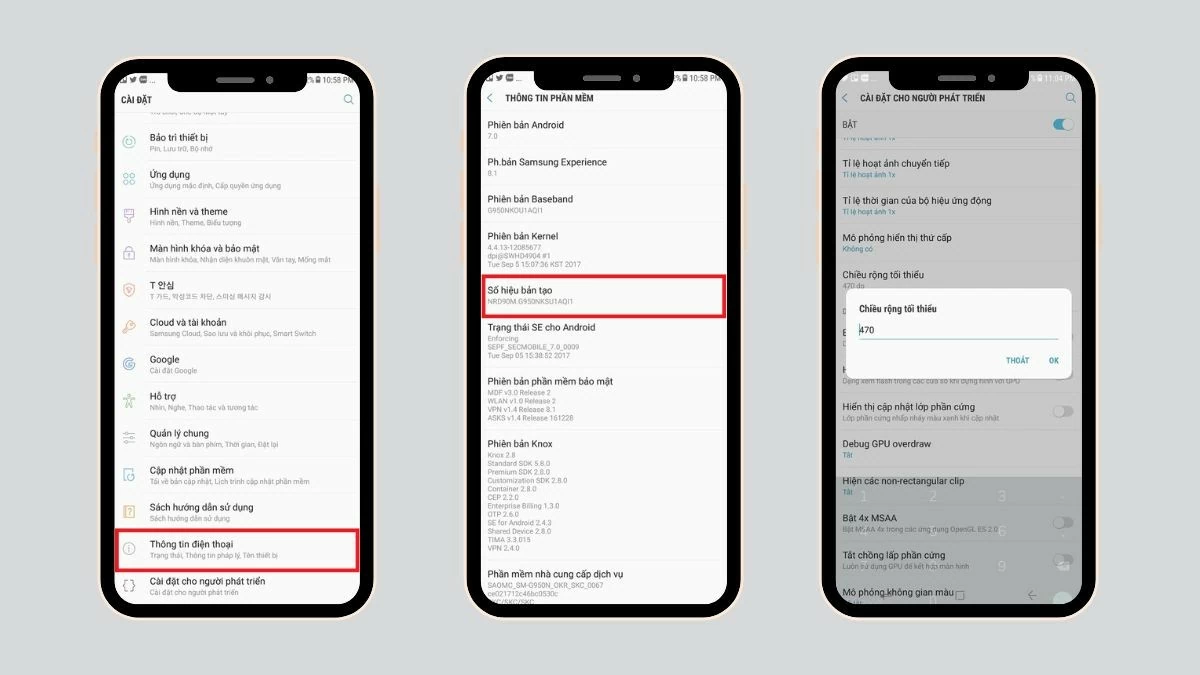
Developer settings are a very useful DPI adjustment method for older devices that cannot be upgraded to newer versions of Android. Here is a guide on how to adjust DPI on Android using this method:
Step 1: Open the Settings app on your phone, then find and select Phone information.
Step 2: Tap repeatedly on the Build Number. A notification will appear informing you that you have become a developer.
Step 3: After completing the above steps, go back to Settings and find Developer Options. Under Minimum Width, you will see the default value.
Step 4: To adjust the DPI, you can drag the slider at the bottom. Alternatively, if you want to be quicker, you can directly enter the number you want into the input box.
 |
Instructions on how to adjust Samsung DPI using ABS Drive
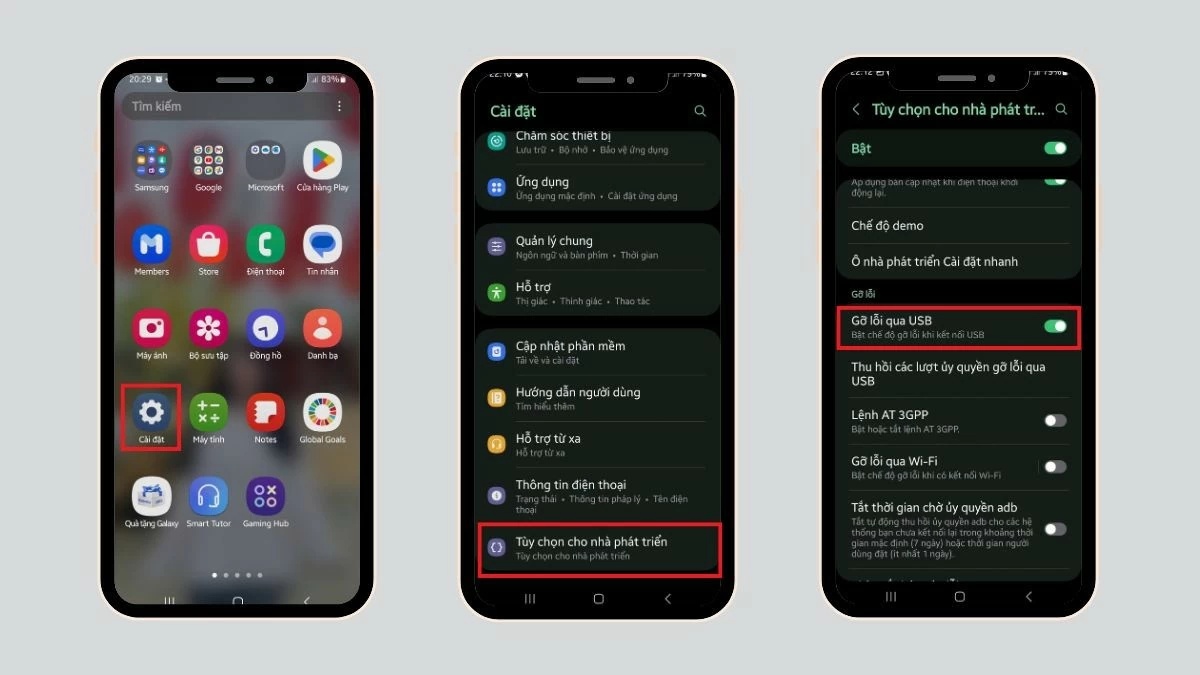
The ABS Drive method for adjusting DPI on Samsung is useful for older devices, although the process is more complicated than other methods because it requires the use of a computer. Here are instructions on how to adjust DPI on Samsung Galaxy via ABS Drive:
Step 1: First, download the ABS Drive application to your computer. Then, go to Settings on your phone and find Developer Options to enable USB debugging.
Step 2: Open the downloaded ABS Drive folder on your computer. To open the Command window, press the Shift key and right-click.
Step 3: Type the command adb shell wm density xxx , where "xxx" is the DPI value you want to set, then press Enter to confirm. Finally, you can disconnect the two devices and experience the resolution according to the new setting.
 |
Instructions on how to check Samsung screen resolution
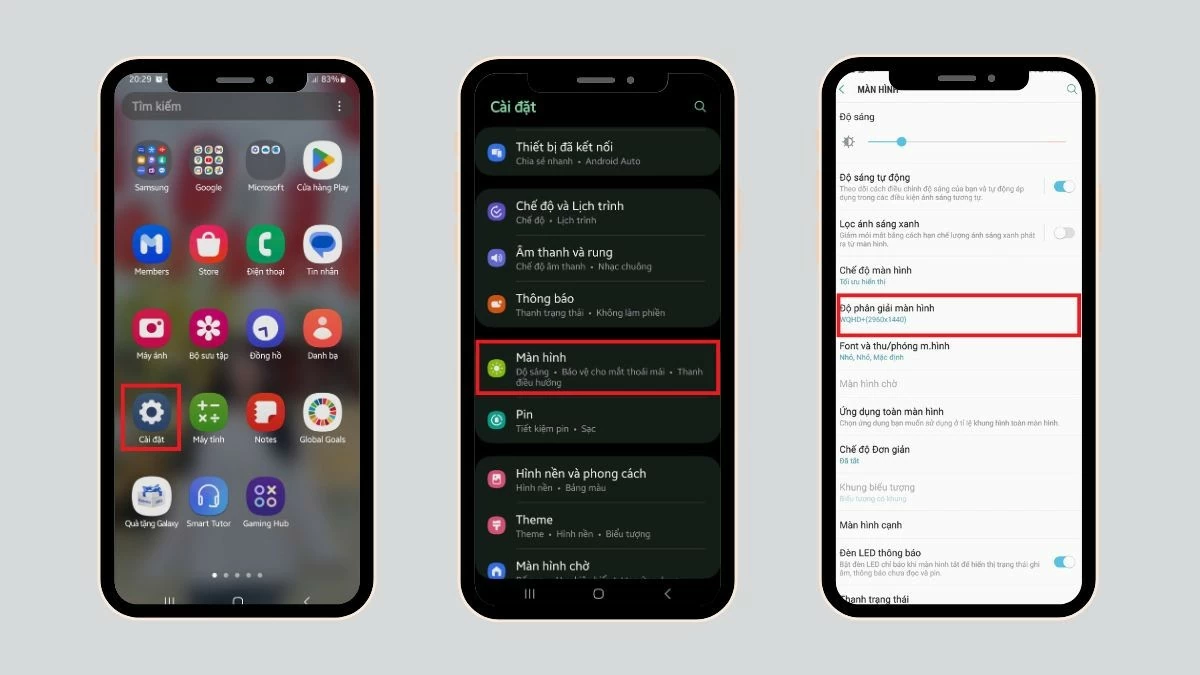
After adjusting the DPI on Samsung, it is important to double check the settings to ensure that the changes have been made successfully and the display quality is satisfactory. Here is a simple way to check the screen resolution on Samsung:
Step 1: Open the Settings app on your phone to start checking.
Step 2: Scroll down and find the Display section to see information about the screen and resolution.
Step 3: Confirm whether the DPI settings on your Samsung phone have been adjusted to your liking.
 |
If the DPI settings on your Samsung are as expected, it means your adjustment process is successful. However, if the results are still not satisfactory, you can adjust the settings again or experiment with other methods to improve the screen resolution to ensure the best user experience.
Changing the image resolution is now simpler thanks to the detailed instructions on how to adjust the Samsung DPI that the article has provided. Hopefully, these methods will help you easily adjust the screen index according to your usage needs.
Source











Comment (0)